
Upload CSV data
To analyze data in Sigma that is not in your data warehouse, you can upload a CSV file.
User requirements
The ability to upload CSV data requires the following:
- The CSV upload feature must be enabled for your organization.
- You must be assigned an account type with the Upload CSV permission enabled.
Limitations
The maximum file size for uploading a CSV-formatted file is 200MB.
Where's my data stored?
When a CSV file is uploaded to Sigma, the data in the file is automatically written to your data warehouse as a new table. If your organization has multiple data warehouses with write access enabled, you can choose which data warehouse to write the data to.
The data in your file is only accessible from the Sigma workbook that uses the CSV file. You cannot see the table created from the CSV upload when browsing the tables in the connection's data catalog.
Create a workbook from a CSV file
-
Click
 Create New in the left navigation panel, then select Upload CSV.
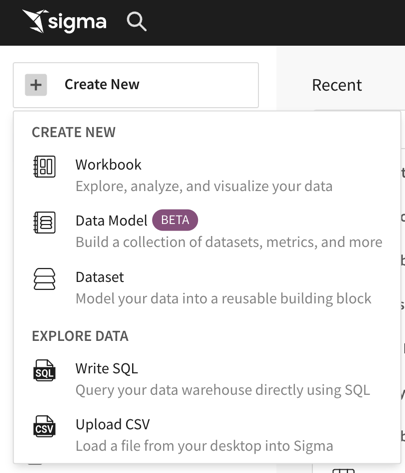
The Upload CSV page opens.
-
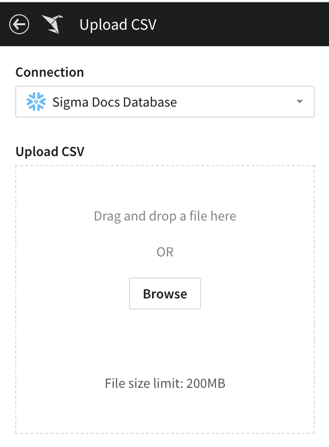
Select a Connection from the drop-down menu to specify the cloud data warehouse to upload your file to.
If only one data warehouse has write access enabled, it is selected by default.
-
Upload your CSV file by dragging and dropping it into the Upload CSV section, or click Browse.
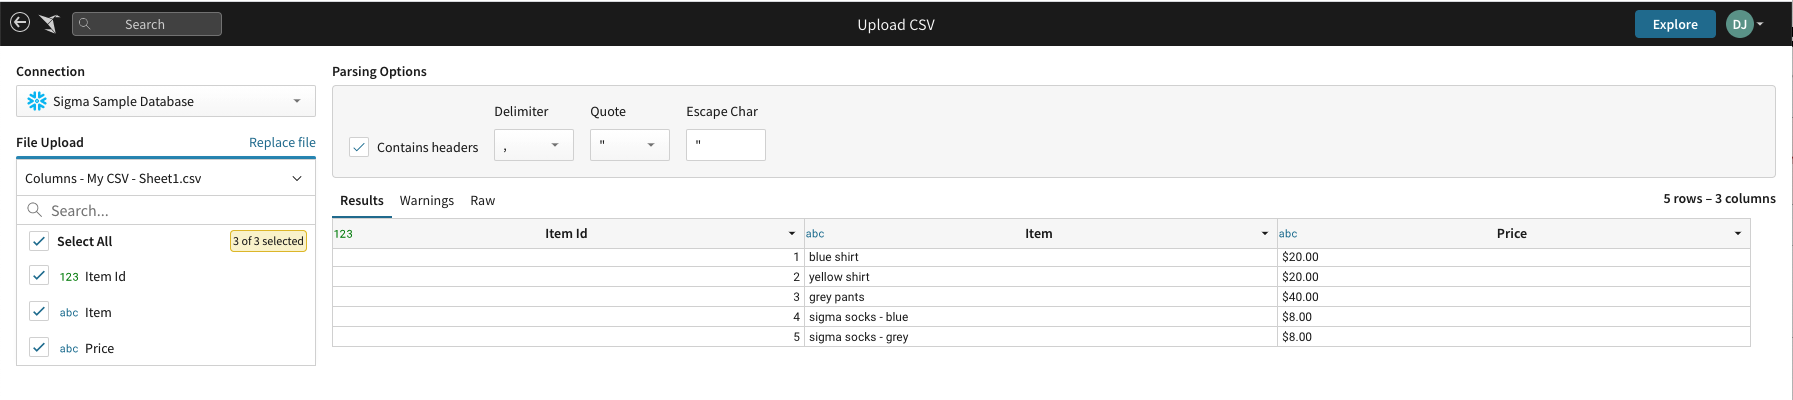
A preview of your data appears.
-
While previewing your data, you can address any warnings or errors and make other adjustments:
- [optional] On the left side of the page, deselect the checkboxes for any columns you want to exclude from the upload.
- [optional] Customize the parsing options under Parsing Options.
-
Click Explore in the top right corner of the page to open the data in a workbook.
Add a CSV file to an existing workbook
If you have an existing workbook, you can add a CSV file as a data element to the workbook.
Before you start: This action is only available in edit mode. To begin editing, click Edit in the top right corner of the page; see Workbook lifecycle.
-
From within a workbook, select
to open the workbook's ADD NEW ELEMENT panel. -
Under DATA ELEMENTS, select the type of element you want to add: TABLE, VIZ, or PIVOT TABLE.
-
As your data source for the element, select CSV to upload a CSV-formatted file.
-
Select a Connection from the drop-down menu to specify the cloud data warehouse to upload your file to.
If only one data warehouse has write access enabled, it is selected by default.
-
Upload your CSV file by dragging and dropping it into the File Upload section, or click Browse.
A preview of your data appears.
-
While previewing your data, you can address any warnings or errors and optionally customize the parsing options in the Parsing Options section.
-
Click Done.
Your new element appears on the page, and the editor panel opens to the specific element’s configuration view.
Updated 3 days ago