
Format PDF exports (legacy layouts)
You can configure the appearance of PDF exports from your workbook, configuring where PDF pages break and how many rows to export for a given table element.
How you configure PDF export formatting depends on the layout used by your workbook:
- Grid layouts (most workbooks). See Compose Elements on a Page.
- Legacy layouts. This page describes PDF export formatting for legacy layouts.
User requirements
The ability to format PDF exports requires the following:
- You must be assigned an account type with the Full explore permission enabled.
- You must be the workbook owner or be granted Can explore or Can edit workbook permission.
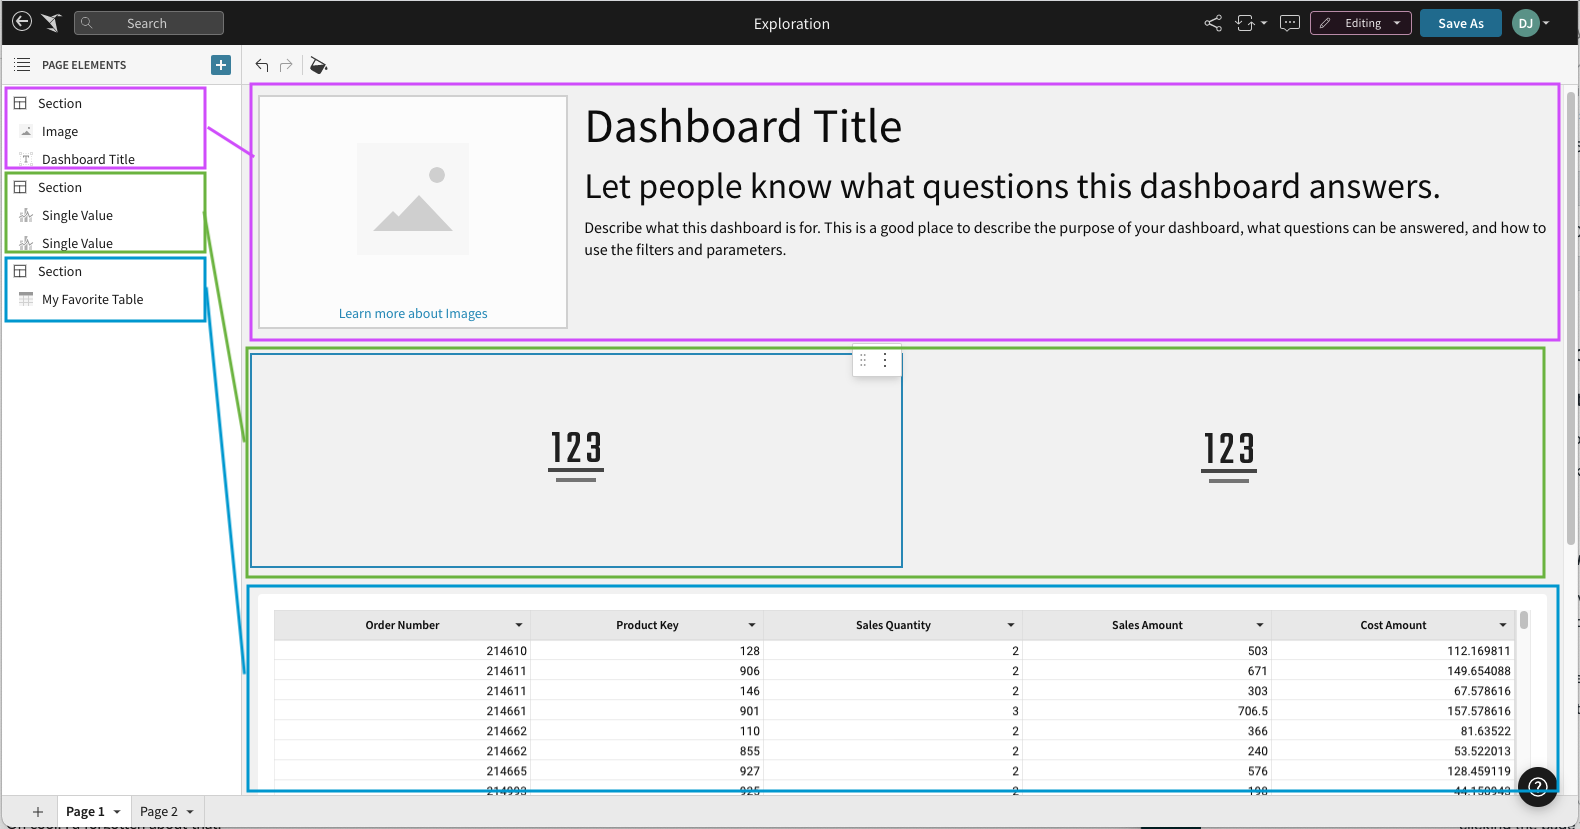
About page sections
Page sections let you lay out elements on workbook pages for workbooks that use legacy layouts.
If a workbook page has elements on it, it has one or more sections with one or more elements.
For example, the workbook in the following screenshot contains 3 sections:
Show first 1k rows
By default, table and pivot tables in exported PDFs only display the number of rows that appear on the dashboard. If you want to display more rows in your export, you can configure the option to show up to 1,000 rows per table. You cannot export more than 1,000 rows per table in a PDF.
When you configure this option, the table headers appear on every PDF page containing the table data, and up to 1000 rows of data for the table are exported.
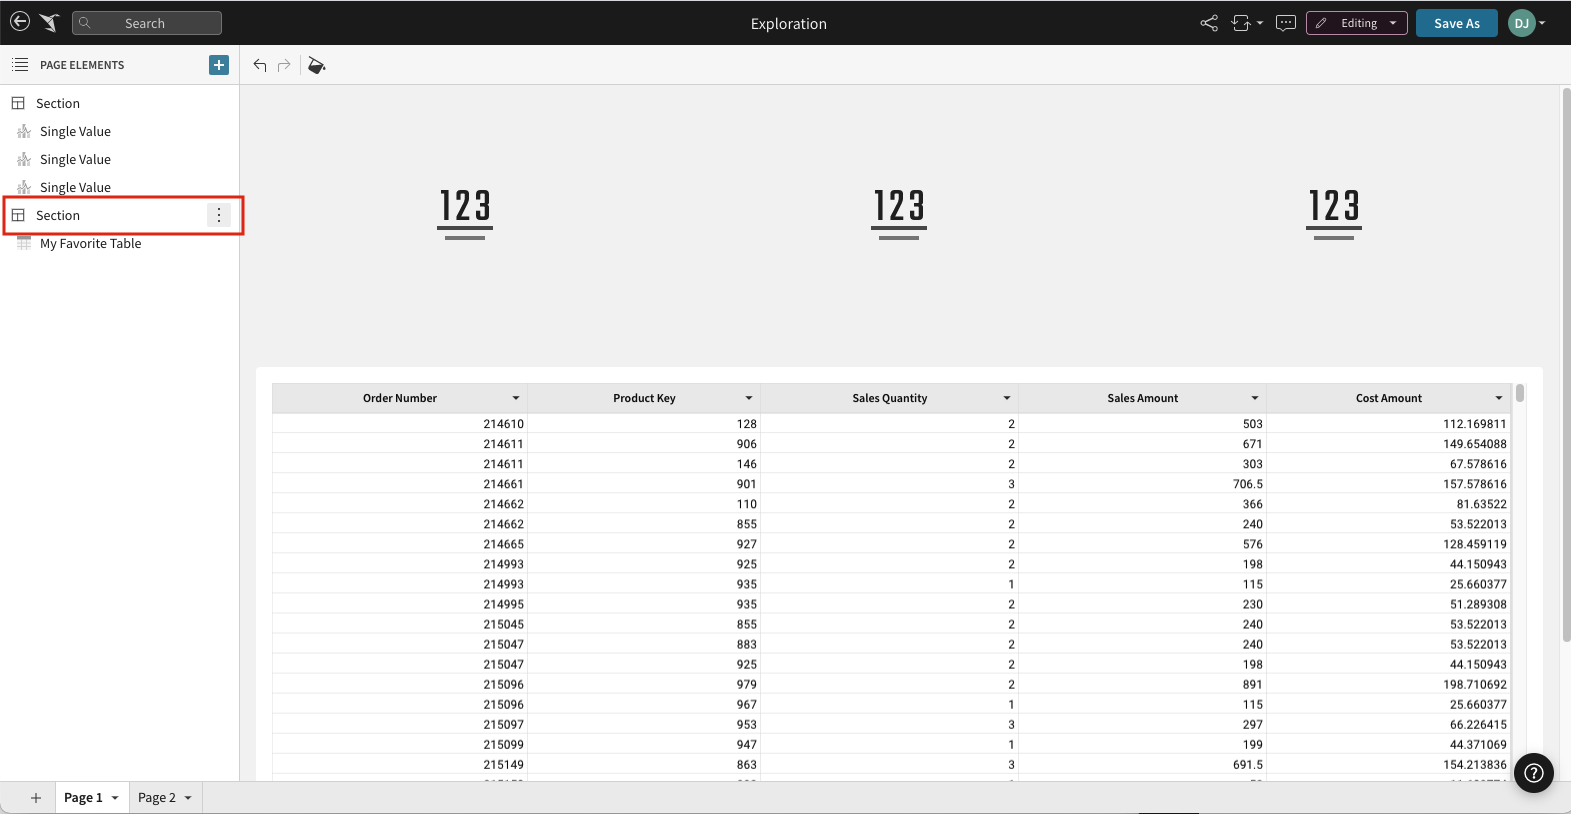
For legacy layouts, you must configure this option for a page section instead of an individual element. The section must only contain a single table or pivot table element.
Before you start: This action is only available in Edit mode. To begin editing, click Edit in the top right corner of the page.
-
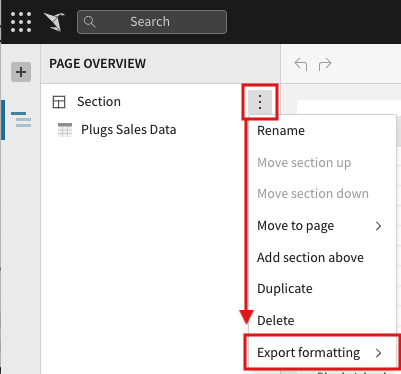
Open the workbook page PAGE ELEMENTS editor panel by selecting the caret.
-
Hover over the section containing your target table or pivot table, and click
 More.
More.
-
Select Export formatting > Expand to first 1k rows.
A check displays beside Expand to first 1k rows if the option is already configured.
To see how the table looks on your export, download the page as a PDF or use Send Now to test an existing schedule.
Add page breaks
You can customize the look of your exported PDFs by adding page breaks after any section in your dashboard.
-
Open the workbook page PAGE ELEMENTS editor panel by selecting the caret.
-
In the editor panel, hover over the section containing your target table or pivot table, and click
More. -
Select Export formatting > Page Break After Section.
A check displays beside Page Break After Section if the option is already configured.
Page breaks apply to your next export.
To see how the table looks on your export, you can do one of the following:
- Download the page as a PDF
- Send a scheduled export on demand to test an existing schedule.
Updated 3 days ago